
Transforming your outdoor space into a cozy haven is a fulfilling endeavor. One way to achieve this is by creating your own DIY deck chair. Crafted with your own hands, a deck chair can be a stylish and comfortable addition to your patio, backyard, or balcony.

At Kaltimber, we are not decking chair experts, but we have made a few through our custom furniture orders, and, added to our general woodworking knowledge, we’ve put together this guide for you. In this guide, we'll take you through the step-by-step process of building your very own deck chair.
Materials You'll Need:
First, let’s look at what you need in terms of tools!
Pressure-treated lumber (cedar, pine, or redwood)
Screws
Wood glue
Sandpaper
Drill
Saw
Measuring tape
Clamps
Paint or stain (optional)
Step-by-Step Guide:
1. Design and Measurements:
Begin by deciding on the design of your deck chair. You can find inspiration from existing designs or create your own. Sketch the chair's dimensions and angles, considering factors like the seat height, backrest angle, and armrest height. Once you have your design, measure and mark the lumber accordingly.
2. Cutting the Lumber:
Using a saw, carefully cut the lumber according to your measurements. Remember to sand the cut edges to ensure a smooth finish and reduce the risk of splinters.
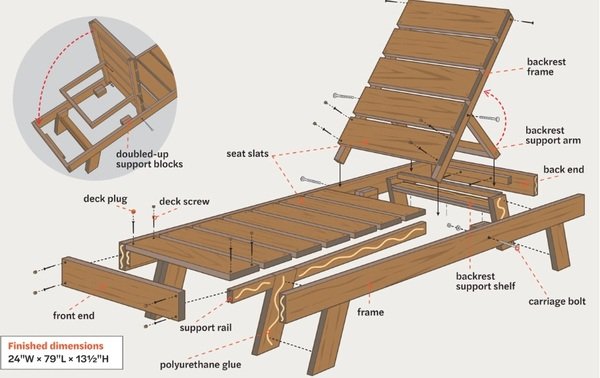
3. Assembling the Frame:
Assemble the main frame of the deck chair, connecting the legs, backrest supports, and armrests. Use wood glue and screws to secure the pieces together. Clamps can be helpful to hold pieces in place while you're attaching them.
4. Creating the Seat and Backrest:
Attach the seat slats to the frame using screws, ensuring even spacing between each slat. For the backrest, position the slats at a comfortable angle and secure them to the backrest supports.
5. Adding Armrests:
Attach the armrests to the sides of the chair frame, ensuring they are at a comfortable height. Secure them with screws, making sure they are level and stable.
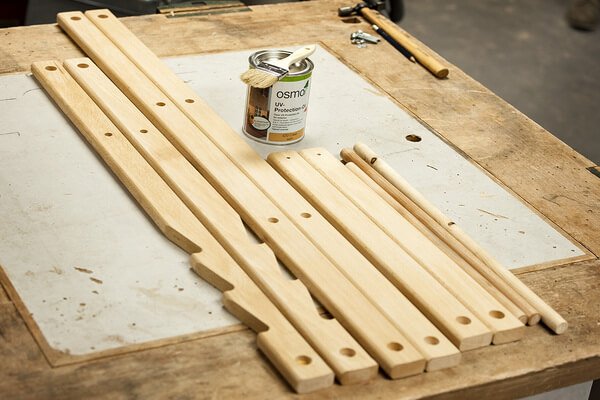
6. Finishing Touches:
Give your deck chair a polished look by sanding any rough edges and surfaces. If desired, you can apply paint or stain to protect the wood and enhance its appearance. Allow the finish to dry completely before using the chair.
7. Enjoy Your Creation:
Once your DIY deck chair is complete, place it in your outdoor space and take a moment to admire your handiwork. Relax and unwind in your comfortable and stylish chair, knowing that you've created something unique for your home.

So, when do you start?
Crafting your own DIY deck chair is a rewarding project that allows you to customize and enhance your outdoor living space. With some basic tools and materials, a bit of creativity, and a willingness to learn, you can build a comfortable and inviting deck chair that complements your style and adds a personal touch to your outdoor oasis. So, roll up your sleeves and embark on this woodworking adventure – your relaxation heaven awaits!